Welcome to Electric-Bikes.com
Charger Electric Bike - Rear Wheel Removal Procedure (part 1)
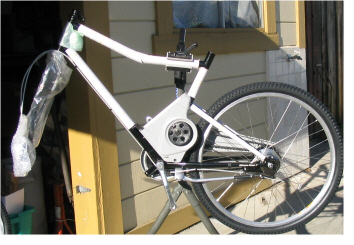
When assemblying your new Charger electric bike, plan to install tire liners and thorn-resistant tubes. Some folks wait until they get their first flat, squeeze in some Slime, pump up the air pressure, and go for a ride. If the Slime doesn't seal the puncture, then they use this procedure to add TR tubes and liners. [Editor's note: I'm one of those people.]
A bike stand to hold the bike up helps ease the process.
Important Note:
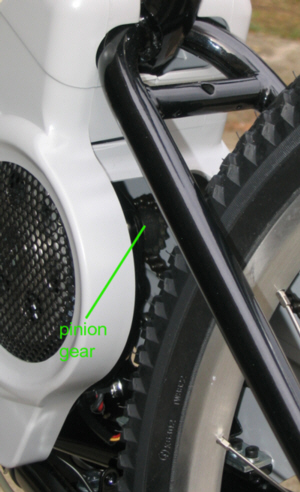
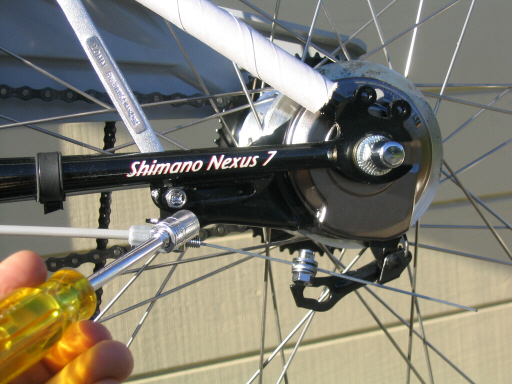
Throughout this procedure, the right cover panel is shown installed on the bike. After several attempts, we've concluded that removing the panel makes the most sense. Many folks have problems with the pinion gear when removing and installing the two chains. Removing the side panels effectively eliminates those problems.
If the motor's power chain gets too loose, it will fall off the pinion gear. If it goes to the outside, it tends to jam up. If it falls to the inside, it will hang on the pinion gear's shaft.
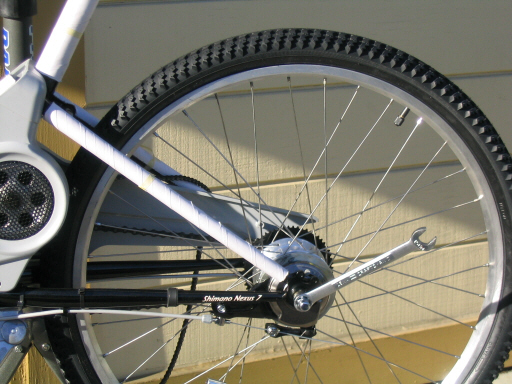
In addition to the pedal chain, there's a motor chain, brake cable, and (not visible in this photo) a gear-shifting cable that must be disconnected before removing the rear wheel.
To loosen the motor drive chain, unscrew the tension-adjusting bolt until it's nearly out. This allows you to reach behind the gray plastic side panel to pull the chain out and off the motor's drive sprocket.
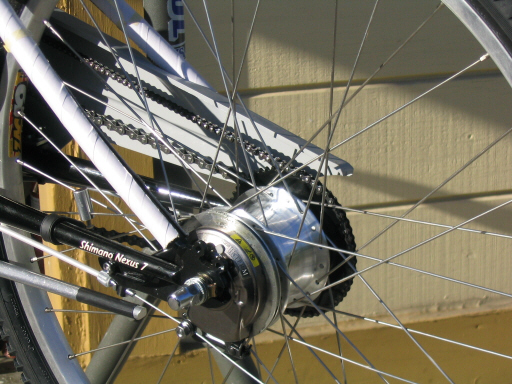
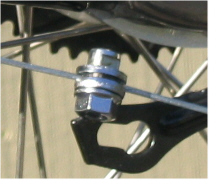
Once free of the drive sprocket, the motor drive chain can be pulled to the rear and over the side panel to rest out of the way. Now, you can loosen the axle nuts with a 15mm wrench; unscrew them until they're nearly off.
The brake cable can be easily disconnected by removing the cable retaining nut from the brake lever arm; a small spring-clip holds it in place. The brake housing is held to the frame with a 10mm screw (shown with hex/Phillips head) and a Nylock nut; remove them.
If you ever adjust the rear brake cable lock nut, make sure the grooved washer seats properly on the cable, or else it will deform and require replacement (or filing for it to fit back on).